Icon Network Workshop II
Workshop II: Olifa Varnish cleaning methods

Friday 6 March 2009, by Icon Network
All the versions of this article:
- [English]
- [français]
Workshop II has been arranged within the framework of the Icon Network Project with the support of the 2007-2013 Cultural Program of the European Commission and the Atelier de Conservation-Restauration d’Œuvres Peintes (Nantes, France).
The second workshop of the Icon Network concentrated on the cleaning of icons which are coated with olifa varnish. During the week, Ms Azarnina demonstrated to the group how to identify and clean olifa varnish, how to make sturgeon glue and sturgeon glue gelatine and how to treat internally and externally damaged icons using sturgeon glue. The group also actively participated in the cleaning of icons for practice purposes using Ms Azarnina’s techniques.
![]() Cleaning of Methodology of the Virgin of Smolensk
Cleaning of Methodology of the Virgin of Smolensk
![]() Cleaning Methodology of the St George Icon
Cleaning Methodology of the St George Icon
![]() Cleaning Methodology of the St Nicolas Icon
Cleaning Methodology of the St Nicolas Icon
![]() Sturgeon Glue
Sturgeon Glue
|
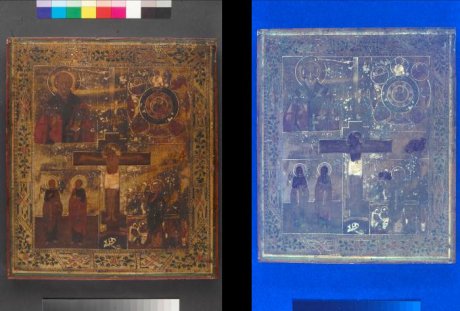
UV photographs:
UV Phillips lamps TLD 36W-08 (8 lamps)
http://www.francelampes.com – (Fr-En)
Nikon D200, 100 ISO
f11, 10 to 20 seconds, using Kodak Wratten 2E filter
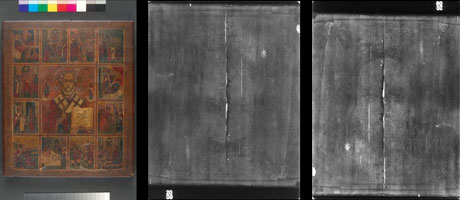
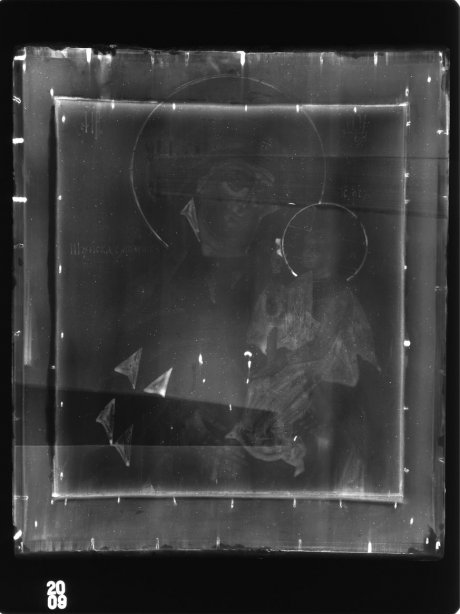
Radiographies X : For icons having a thickness of 3-4 cm
Industrial tube Seifert 225 Kv, 13 mA, having a beryllium window
Films Agfa Structurix D4 (équivalent Kodak MX125)
40 Kv, 10 mA, 42 secondes (30 seconds for a thinner icon)
40Kv, 15 mA, 30 seconds for more contrast
Scientific photograph: Jean-Gabriel Aubert
Email : arcantique.photos@wanadoo.fr
LABORATOIRE DE RESTAURATION ET DE RECHERCHE
Établissement Public de Coopération Culturelle créé par le Conseil général de Loire-Atlantique, les Régions Bretagne et Pays de la Loire, la Ville de Nantes et le Ministère de la Culture et de la Communication.
26, rue de la Haute Forêt • 44300 Nantes • Tél. 02 51.81.09.40 • Fax. 02 51.81.09.36 • courriel : arc.antique@wanadoo.fr
Code APE 9003A • N° SIRET : 494 191 570 00014
Cleaning of Methodology of the Virgin of Smolensk
The main icon which was used to demonstrate the cleaning techniques was The Virgin of Smolensk. Other icons were also practiced on by the participants following the techniques demonstrated.
The varnish on the icon of the Virgin of Smolensk was olifa. The varnish was not evenly coated and shows signs of earlier cleaning attempts which appear unsuccessful as it has been harshly removed from the faces and other areas and has left them open to further damage. There appear to be a number of cracks on the icon surface, particularly on the faces which have expanded during the earlier cleaning attempts. Ms Azarnina did not attempt to clean those areas, (on which there are faces) as doing so would probably cause more irreversible damage to the painted surface of the icon. This is especially true when attempting to clean using chemicals and should be avoided.
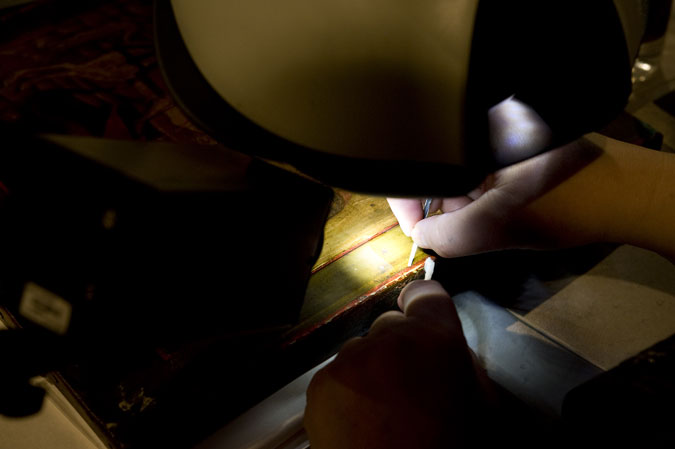
The varnished surface of the icon is uneven: there are several coats of olifa varnish which are unevenly distributed. The bottom half of the icon also has wax residues visible, most likely to be dropped candle wax. The first step on cleaning an icon which has olifa varnish is to begin with mechanical cleaning on a small area. The area which will be tested should incorporate several aspects of the icon, for example, gold leaf, faces and clothing and background colours. The tools used for this are scalpel and sandpaper under a microscope. Initially, only one layer of the varnish will be removed, very slowly and gradually other layers will follow. A light and controlled touch is essential as this will allow the conservator to ‘feel’ the strength and texture of the varnish and not remove too much and thus risk damaging the painted surface. The wax residues are also removed in a mechanical way. A light touch is also essential when cleaning wax off an icon, as there is a risk of staining the surface if pressure is applied.
There are some places which have been previously cleaned, such as faces, which will not be chemically treated as the solvents will impregnate the cracked surface and ruin the painted layer further. In order to consolidate and stabilize the small surface cracks, Japanese paper is used in conjunction with steam to protect them and then drops of glue are dropped in the cracks to consolidate and seal them. Cleaning using chemical solvents follows. The strength of the solvents should be low and gradually built up if needed.
- Vierge de Smolensk
- Open the Gallery
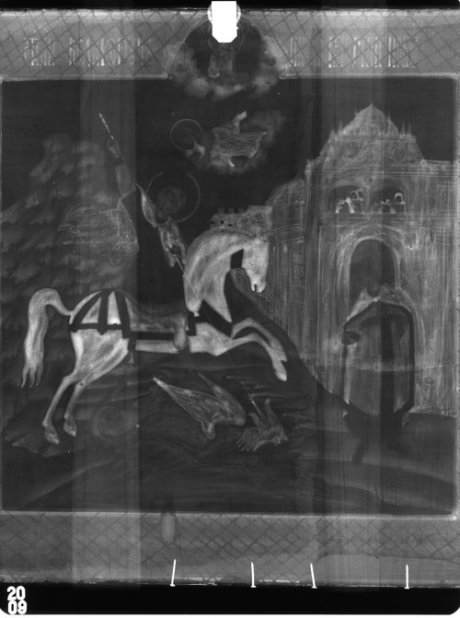
Cleaning Methodology of the St George Icon
This icon is coated with an evenly spread varnish, which, after observation, appears to be an oil based resin.
Observation under the microscope shows us that the varnish is evenly spread, with a few cracks visible to the naked eye, especially over the gold leaf. A test using chemical solvents is done on the surfaces where cracks are visible in order to see how the surface reacts. Mild solvents are preferred at this stage.
![]() Mechanical Cleaning:
Mechanical Cleaning:
The resin varnish is softened using turpentine oil (if needed, ethanol can also be used for this purpose), and slowly removed using a scalpel, under the microscope. One layer of the resin based varnish is removed this way to see how it ‘feels’ and gradually, more layers are removed until a thin resin layer remains.
![]() Chemical Cleaning:
Chemical Cleaning:
The solvents used for this are quite strong. They are a mixture of: 3 parts Ox Gall, 1 part ethanol and 1 part DMF or 3 parts dimethyl sulfacid.
The Ox Gall makes the varnish swell, the ethanol softens it and the other solvents prevent the evaporation of the solution. If the solvent is too strong, it can be diluted or made milder by changing the proportions used: 5 parts Ox Gall, 1 part ethanol and 1 to 2 drops of dimethyl sulfacid.
- Saint George RX
- Open the Gallery
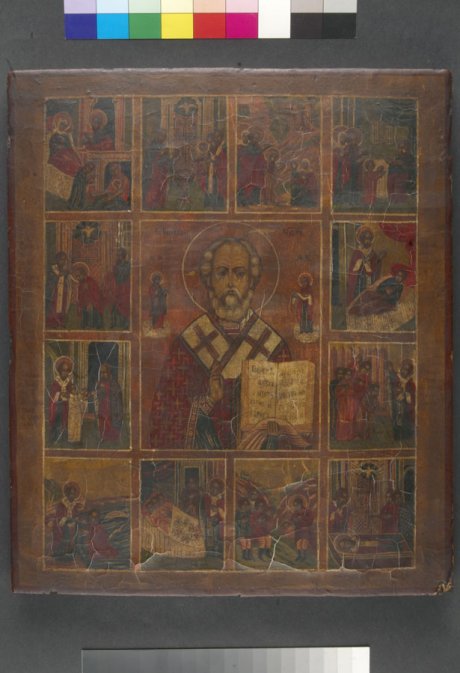
Cleaning Methodology of the St Nicolas Icon
The painted surface of the icon is covered with a varnish which seems to contain a kind of wax. It is evenly layered and has a grey hue. A drop of water was placed on the surface but was not impregnated into the waxy layer thus indicating that the waxy varnish forms a solid barrier.
Elena first used turpentine oil to soften and dissolve the waxy varnish. She then dropped a minute amount of water to see if the barrier was still impregnable. In this particular case, the varnish must be removed as the icon is structurally damaged and must be secured. The icon has raised surfaces and cracks are visible on the underlayer. She plans to secure the structure of the icon with sturgeon glue. The surface of the icon must be cleaned to such as extent so as it is not a firm barrier and can be impregnated with the sturgeon glue.
Sturgeon Glue
![]() sturgeon glue (solid block)
sturgeon glue (solid block)
![]() Water
Water
![]() Honey
Honey
Elena first soaks the block of sturgeon glue in cold water for a day (no proportions are necessary from water to sturgeon glue at this stage). She then takes the softened glue and places it in a bain-marie and slowly boils it for 3-4 hours.
She then strains the mixture through a gaze and spreads it on an even surface. It is advisable to use a flexible surface such as melinex or plexi glass for this.
When the gel has set, she cuts it into even pieces which are weighed and stored. She makes packets of 2, 4 and 8 grams. The glue can be kept for up to 3 months.
The different packets of glue are used for alternate purposes. They are prepared for use in the same way: dissolve in hot water and a specific amount of honey depending on the amount of glue used is diluted in the mixture.
![]() 2%= (2 grams glue + 2 grams honey in 100 grams water) used for surface coating, and as a preparatory layer for fixing and strengthening.
2%= (2 grams glue + 2 grams honey in 100 grams water) used for surface coating, and as a preparatory layer for fixing and strengthening.
![]() 4%= (4 grams glue + 4 grams of honey in 1 litre of water) used for facing.
4%= (4 grams glue + 4 grams of honey in 1 litre of water) used for facing.
![]() 8%= (8 grams glue + 8 grams of honey in 1 litre of water) used for injecting risen parts of the painted surface area.
8%= (8 grams glue + 8 grams of honey in 1 litre of water) used for injecting risen parts of the painted surface area.
Tips on how to use the glue mixture:
![]() For a better impregnation of the glue under a surface, dilute with ethanol and alcohol (1:1) and insert in crack with a brush or injection.
For a better impregnation of the glue under a surface, dilute with ethanol and alcohol (1:1) and insert in crack with a brush or injection.
![]() In case there are raised bubbles on the surface, soften first with 1-2% glue and then proceed to the impregnation with the 8% mixture.
In case there are raised bubbles on the surface, soften first with 1-2% glue and then proceed to the impregnation with the 8% mixture.
![]() In case of separated layers, penetrate first with weaker solutions.
In case of separated layers, penetrate first with weaker solutions.
![]() Case Study: Impregnating an Icon with Sturgeon Glue
Case Study: Impregnating an Icon with Sturgeon Glue
![]() Icon used: the small icon of the Virgin Mary.
Icon used: the small icon of the Virgin Mary.
The icon has deep tunnels inside the main wood structure, which rise to the surface and has also raised surface areas as well as detached parts of the painted surface.
Procedure in Stages:
Elena covers the whole surface in 2% glue. She repeats the procedure until the surface cannot absorb any more of the mixture. This takes approximately 4 hours.
Facing: She adheres pieces of thin paper on the whole painted surface of the icon with 4% glue. Tip: the fibres of the rice paper should be facing the same direction with the wood grains. The papers should not be symmetrical.
Injects the wood tunnels with the 8% glue (in which chalk has been added). She proceeds very slowly and as she injects she presses down on that particular spot with a smooth tool made of rounded bone in order to prevent the surface from swelling. If heat is to be used, a small portable heated spatula can be used. Elena prefers a small one, so as to limit and control the heat and also to better control the tool itself.
When the surface of the icon cools down she places little weights on it. Before she does that though she places little sachets filled with sand on the surface to draw out any moisture and condensation. After they are removed, the little weights are placed on the surface for at least 24 hours, but the optimal duration is about 5 days.
![]() Tip: When the varnish is synthetic, alcohol is also diluted in the 2% sturgeon glue concentration.
Tip: When the varnish is synthetic, alcohol is also diluted in the 2% sturgeon glue concentration.
![]() Tip: If the raised bubbles on the surface are sealed, then you soften them with steam until they open. Use any open area to get to the tunnels, i.e.: cracks but always protect the surface with facing.
Tip: If the raised bubbles on the surface are sealed, then you soften them with steam until they open. Use any open area to get to the tunnels, i.e.: cracks but always protect the surface with facing.
- Saint Nicolas
- Open the Gallery


